The Easy Way to Use a Kopykake Projector
What do Kopykake projectors and Robert Downey Jr. have in common? Nothing really, except that I kinda love them both.
Over the years I’ve made no secret of my affection for Kopykake projectors. I mean, what’s not to like about a machine that can turn a five hour nightmare into a manageable, two hour job?
It may surprise you to know that my Kopykake and I didn’t start out on the best of terms. When I ordered it, I expected a magic machine. Talk about a disappointing surprise! No one mentioned that it would take time and practice to learn how to effectively utilize it as a cookie decorating tool.
Long story short, I eventually learned to love the beast and we lived happily ever after. Since then, I haven’t given our relationship much thought. Then, a couple of weeks ago I shared template for One-Direction cookies, touching briefly on how to decorate cookies using a Kopykake. I was surprised at how well people liked the idea, so I decided it was worth a little more explanation.
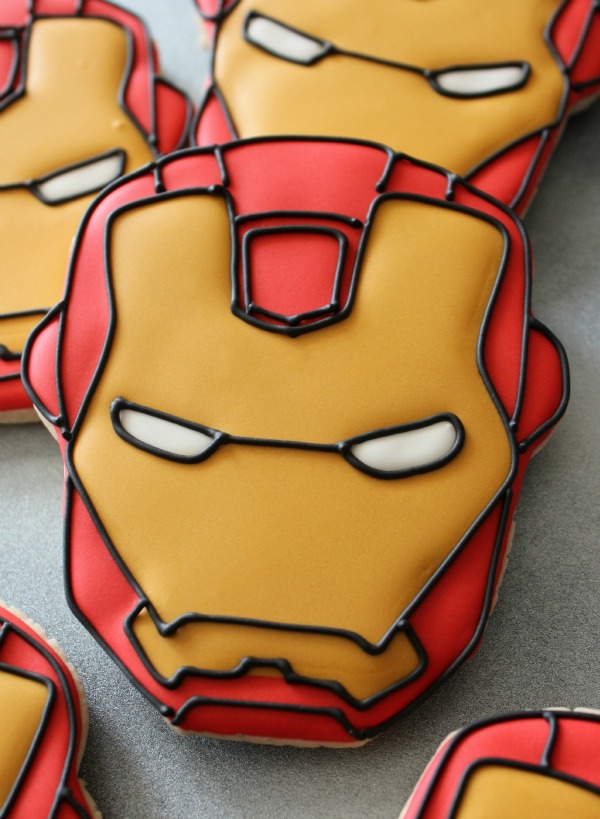
Here is an in-depth look at how I approach cookie designs (like Iron Man) using my Kopykake projector.
 Sometimes, I begin with an existing cutter and with the help of my Kopykake, adapt the design to fit. You can see a great example of that HERE.
In this case, however, I found a pretty straightforward image to use as a template, so I hand-cut the cookies.
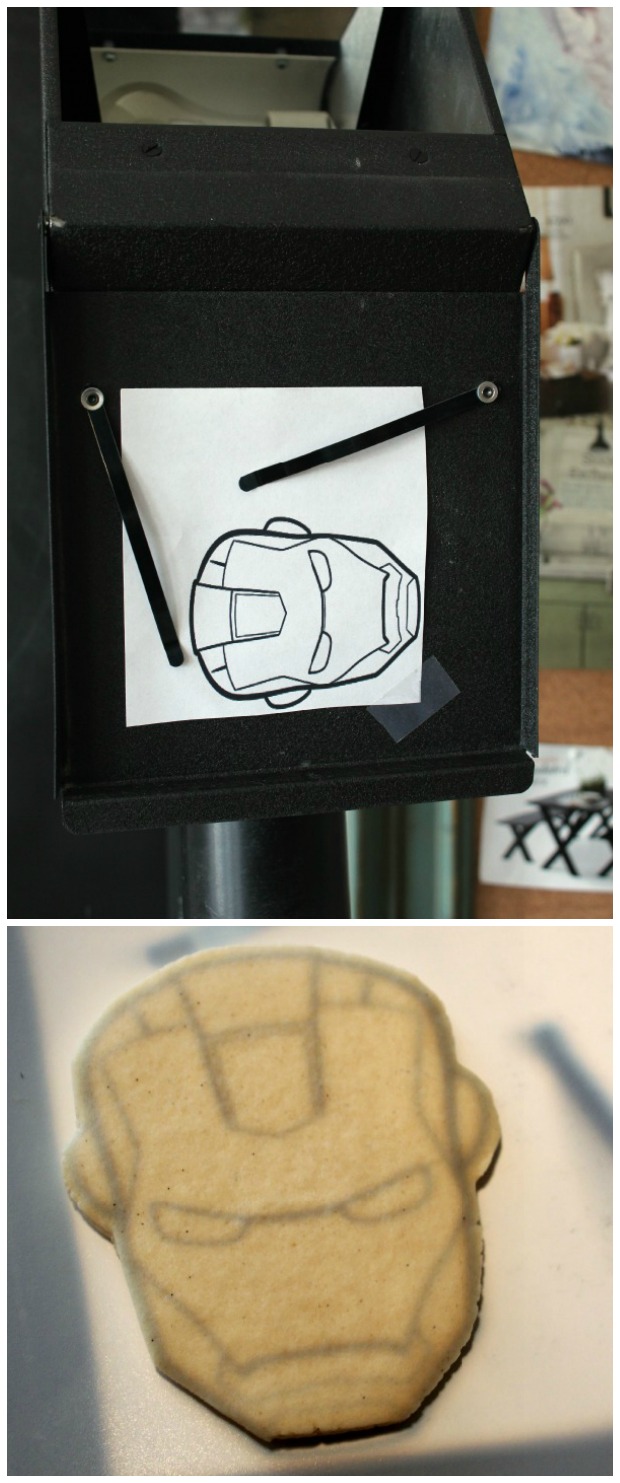
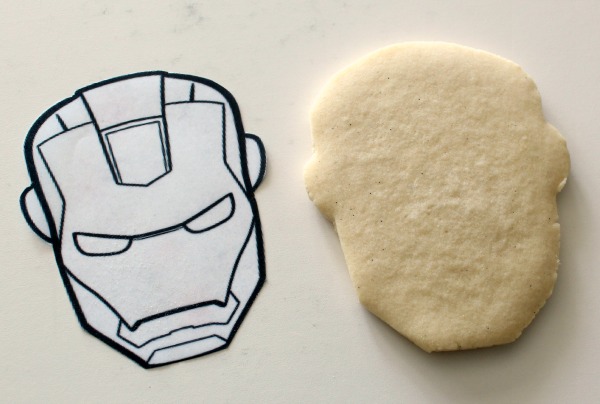 Once the cookies were baked, I placed a copy of the template into the projector and adjusted the lens so that the image was the same size as the cookie.
 Many people prefer to pipe the design outline-style onto the cookie before flooding, but I like to add color first.
Using 20-second icing, I quickly filled each section to quickly cover the base. Luckily, it wasn’t even necessary to allow drying time in-between steps.
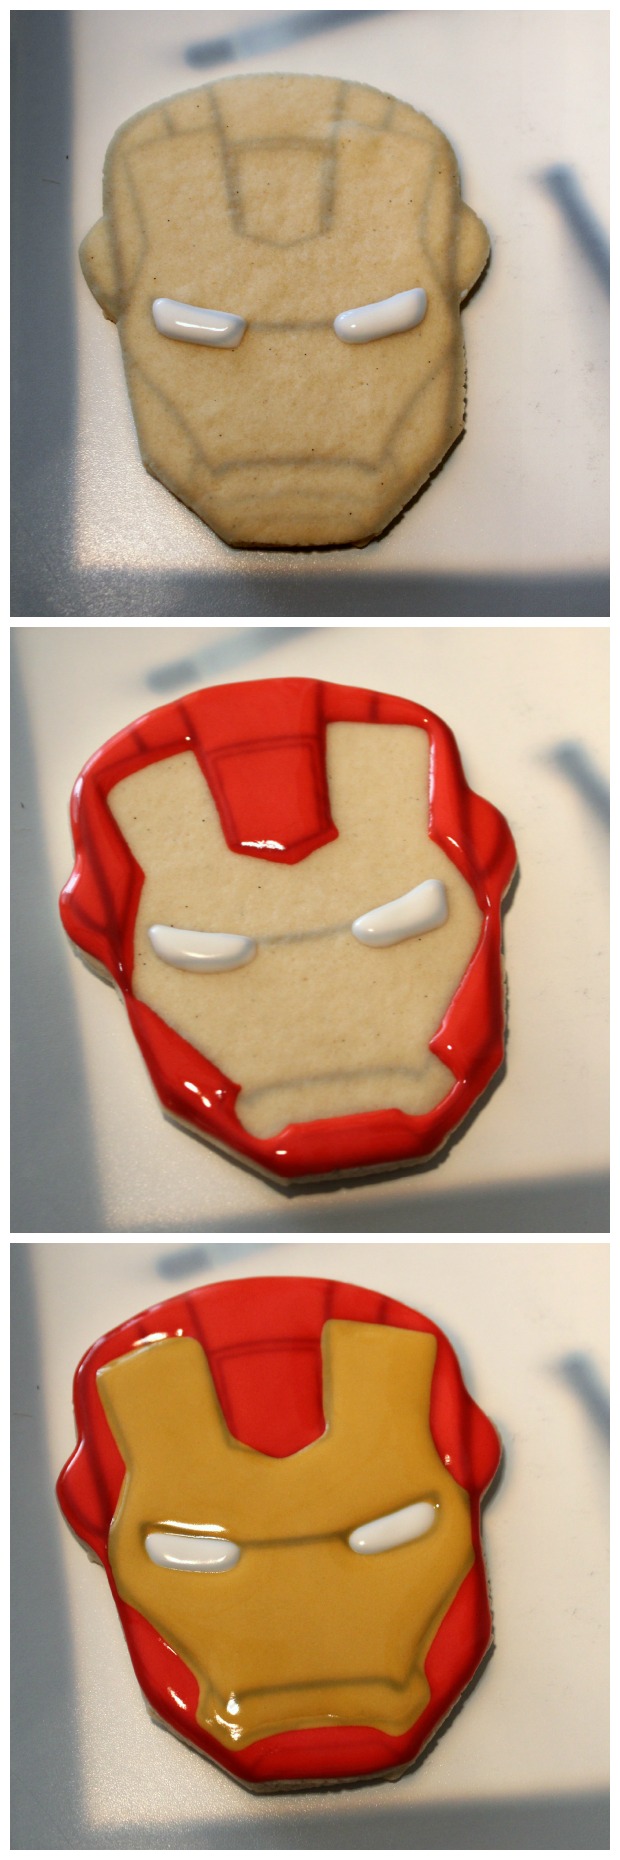 Just a little tip, from experience, my images are often black and white (to conserve printer ink) so I keep phone nearby to help me keep track of where each color should be.
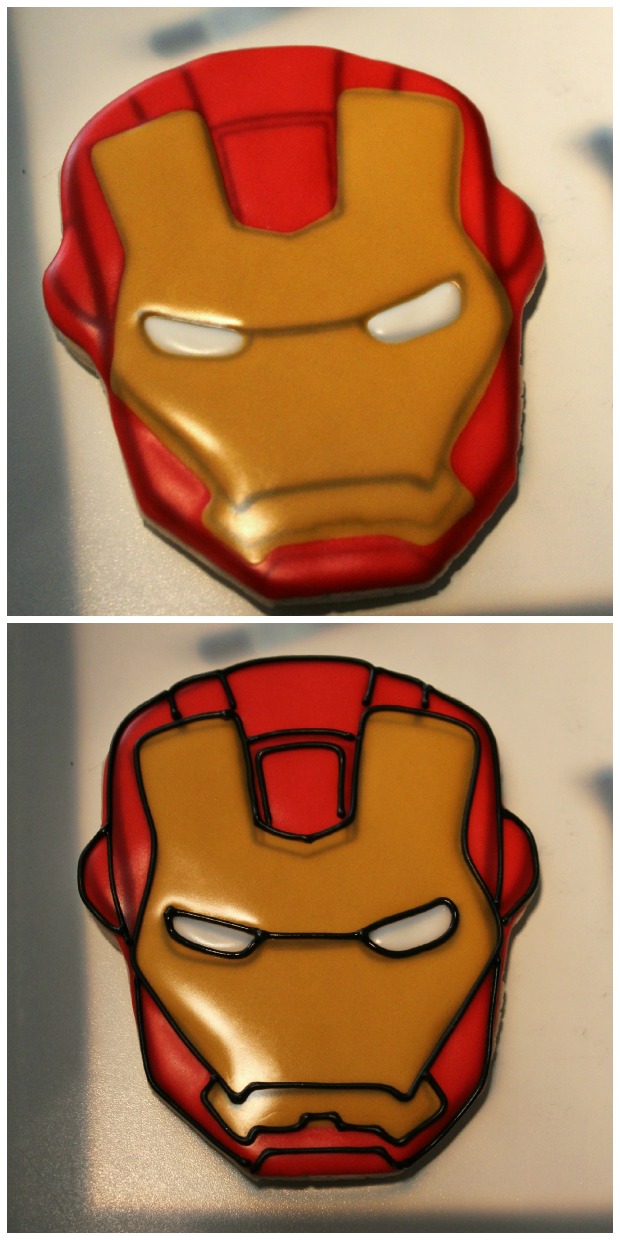
Just to be safe, I make sure the base is dry before piping the black outline.
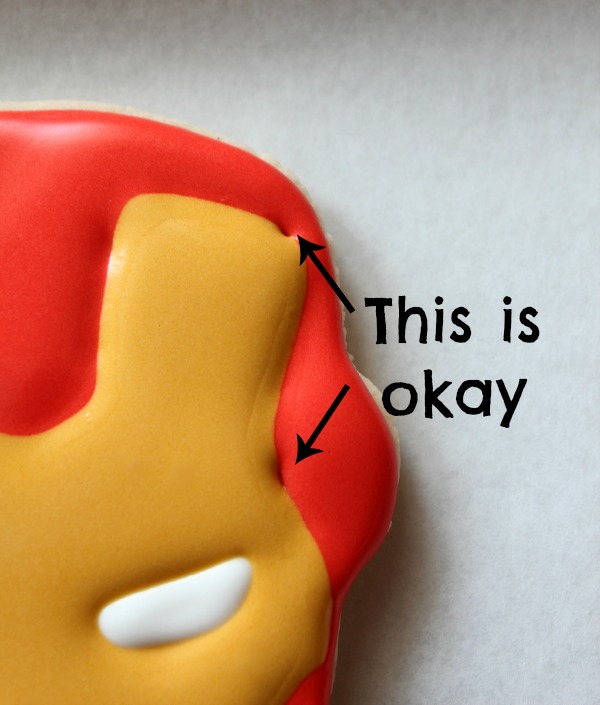
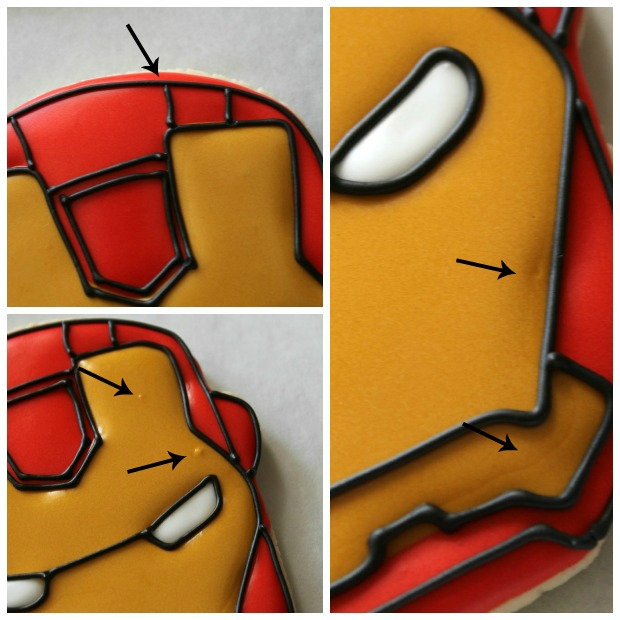
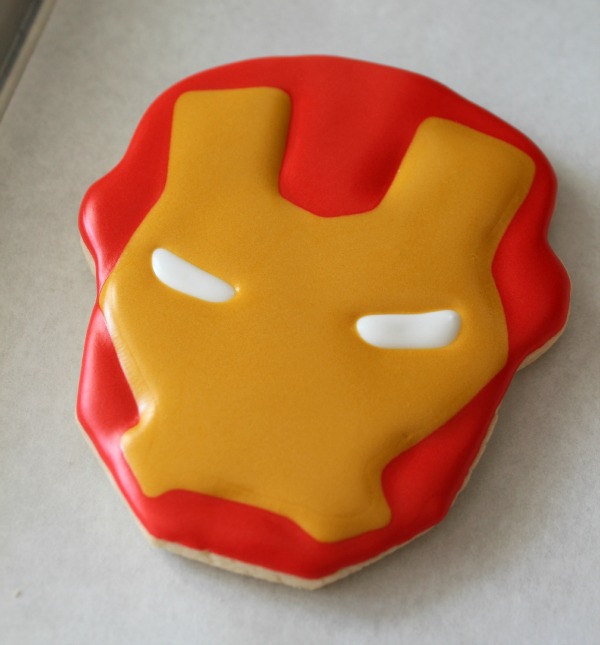 Also, I don’t worry much about little boo boos like these, since most of them end up covered with piping.
 To finish up, I place the cookie back under the projector and use piping icing and a #1.5 tip to add details.
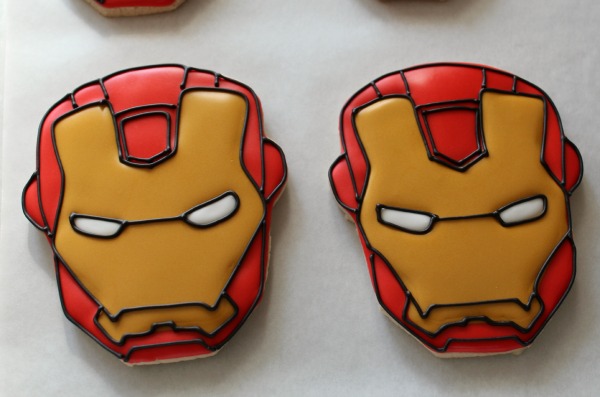
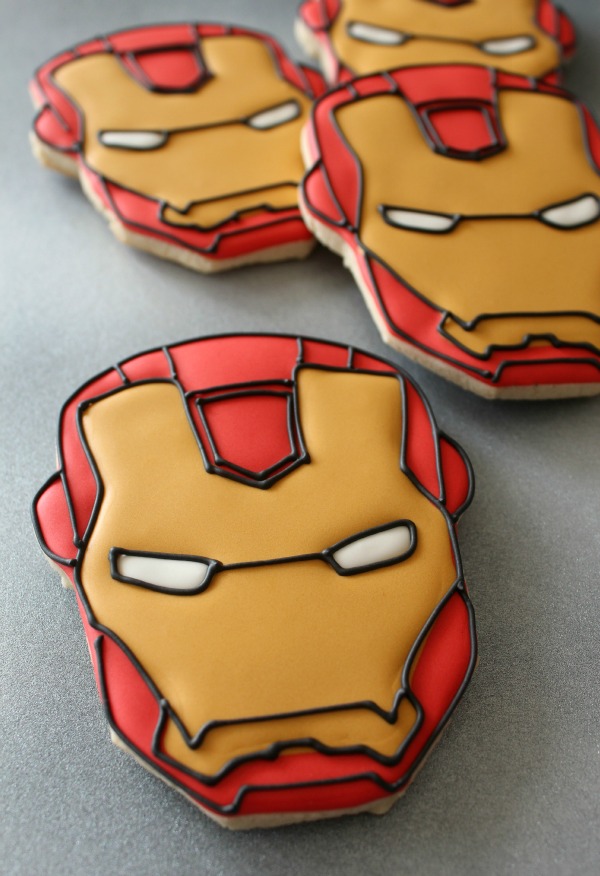
 Remember I mentioned not worrying about perfection? If you look closely, each cookie is a teensie bit different, but I promise that no one will notice. Except you, of course.
 On that note, I thought I would point out a few of my own boo boos to illustrate a point.
It’s in our nature as cookie decorators to be overly critical of our work, but in the grand scheme of things tiny imperfections aren’t really that big of a deal.
 I’ve made cookie after cookie with great results using this method. It cuts down on cratering, mixing time and decorating time, and leaves you with a very sharp, detailed design.
 If you don’t own a cookie projector, do not despair! This method takes a bit longer, but it’s a great way to make uniform cookies without a projector.
Have you ever used your Kopykake in this way? If not, try it sometime and let me know what you think. If you don’t own a Kopykake, GET ONE NOW. Try Jerry’s Artarama for the best deals.
For more helpful Kopykake tips, check out these links:
- How to Decorate Cookies with Paper Templates (great for people who do not own cookie projectors)
- How to use a Kopykake Projector
- Special Fonts for Kopykake Projectors
- Printable Kopykake Templates


Awesome post, Callye! Thanks for sharing!
Fabulous post! I LOVE my KK. It has saved me time and my sanity!! Best purchase ever. Even my non-cookie-decorating husband loves it because it makes for a happier me! 🙂
I’m going to have to try the color-first method. Half the time I end up re-piping lines – talk about a time-suck! Great info on using a projector!!
I agree Caylee, they are made with love and by human hands…they can have a couple of flaws and still be awesome…just like real…people that is.
I bought a KK a couple of weeks ago, I am new to cookie decorating, have been a baker since I was a kid, now 58 so the baking part is a no-brainer…after getting it I was kind of questioning my decision…I think in the long run it is going to come in handy…maria
https://www.facebook.com/pages/Dolcelicious-Bake-Shoppe/149523481878103
My kopykake just arrived 3 days ago and I used it for the first time. It will definately cut down icing times..especially because I was making a lot of royal icing transfers. I have to say though we cracked up laughing at the height of it. I thought it would be the height of my mixer…nope! Where the heck am I gonna store it!
Thank you for this post. I’m new to cookie decorating and my kopykake has been sitting unopened for over a month. Silly, but I got really intimidated when it arrived. I have 100 cookies to make for a friend today and tomorrow, so this is incredibly helpful. Thanks again, soo much!
Great post! I used a Kopykake for the first time recently…I’m thinking I might need one…your post is not helping me hold out against it.
Thanks for the KK tips! You’re so right about us being our worst critic. I may internalize every flaw on a cookie, but when I hand it over to someone else they see none of that. Usually, I need to tell myself to “chill out” when I finish a batch. 🙂 Have a great weekend!
Thanks Callye! Question – do you put your 20 second RI in a squeeze bottle or bag?
I always use a bottle for 20-second icing 🙂
I feel so lucky with the timing on your awesome post. My daughter is having an IRON MAN birthday party on opening night of IM3. I’ve just baked the party iron man party favor cookies and now I know I can decorate them with confidence. Thank you so much Callye. Would love to know where you downloaded the picture from….
Here ya go, Victoria. http://www.dragoart.com/tuts/11939/1/1/how-to-draw-iron-man-easy.htm I widened a little to give me a little more room to work with 🙂
I feel so lucky with the timing on your awesome post. My daughter is having an IRON MAN birthday party on opening night of IM3. I’ve just baked the iron man party favor cookies and now I know I can decorate them with confidence. Thank you so much Callye. Would love to know where you downloaded the picture from….
When I first got my KK I didn’t like it at all, I had this idea of this special magical machine that would do everything for me.
Then, outlining the cookies/details it was a huge stress, moving my hands here and there , shaky hands, ahhh
But if you ask me now, I love my KK, with practice I have become better at it. I still outline first and then flood the cookies, but I have found that I would have to go back and outline again in black. Your idea is brillant…. well all your ideas are. i would try it next time I make cookies using my KK
Okay, you had me at “cuts down on cratering!” I have issues with that. I’m going to give it a try! How do you avoid color bleeding? Any tips on that?
Since I am not in the cookie business and just decorate cookies for family and friends, I doubt that I will ever purchase a KK. However, I still learned some new tips and tricks for decorating thanks to this informative post. You are so sweet, to point out your imperfections. I’m sure most of us would be thrilled with these little “oops”, but it’s nice to know that even a great cookie artist like you sees imperfections. I have learned not to fret about them, as my friends always tell me “that’s what makes each cookie unique!”
Keep a look out on Craig’s list…you may find one. And if you don’t, there’s a certain joy in making cookie designs that don’t require one. They’re the most relaxing projects 🙂
About to begin a Cookie All-Nighter and sit down at my computer to look at the order again. Up pops your email link to this post at 10:42 PM and it’s EXACTLY what I needed to help me get focused and figure out my approach (actually how to use YOUR’s!). I loved the pep-talk on “imperfections aren’t a big deal”. Now I’m pumped up with technique and calmed down on stress 🙂 Rolling up my sleeves and getting to it. And remembering how much I actually enjoy the whole process. Thanks so much for being awesome you!
Forgot to mention how great your idea of using your phone image for reference! Brilliant!!! My printer is drunk on colored ink and draining my wallet. The phone is there anyway, it might as well join in and help. I use one of those little acrylic cookie stands from Karen’s to hold my cell phone up at a good angle but it never occurred to me to have a working image on it!!! What a space saver.
Hehehe! That way we can text and decorate 😉
I wish I had one….:(
I love my kopykake and I love your blog!
Thank you Anne! Does your KK have a name?
I’m happy to say my daughter and I bought a Kopykake K1000 from craigslist for $50.00. Great buy! We love it and with practice hope to get good at using it. Thank you for explaining how you use your KK. It’s very helpful for us beginners.
That’s a great deal! I think mine is actually a 1000 also! High five for the great deal!
I think I know what I want for Mother’s Day! I need a Kopykake!!!!
exceptional ! And if you succeed to make a Robert Downey Jr Cake, you’ll be my hero 😀
My most favorite thing about this post is that you showed us that even you, the cookie QUEEN, don’t always have 100% perfect cookies. 🙂 Thanks for sharing, Callye!
Hi Callye – I love this post. I wished I would have waited a day or e-mailed you to ask if you had a tutorial for Ironman cookies. I just made some on Thursday for an Avengers birthday party for tomorrow. I would love a Kopykake but I don’t have the space or money for it but thank you for your post on April 10, 2013 where you had a link for How to draw on a cookie with an IPad via Klickitat Street using the Camera Lucida App it has helped me but I still have a long way to go. I enjoy your blog, work and knowledge. Thank you very much!
As you know, I’ve almost mastered royal icing, so it will just be a matter of time until I have mastered the Kopykake! (With your expert advice!)
Hello from Malta!!
I am so addicted to your blog and I love your creativity! I’ve been doing cupcakes and cakes myself but decorated cookie have always given me a sense of joy far beyond that of cupcakes and cakes! So now after discovering your blog you’ve been such great inspiration and I am going to use all my energy on cookie decorating! Also this kopykake is amazing =]
Thank you so much for the turtorial. I made the One Direction cookies last week doing the colours first and then the outline. If felt like an Oprah Ah Ha moment. So glad to you have your blog in my cookie life.
Thank you!
This is so cool! I always start drooling over the KK every time you post a cookie where you have used it. They look like so much fun and open cookiers up to a whole new level of doing cookies. Not to mention in so much less time. I don’t have one but I love reading about the things you do with them. Keep up the beautiful work and thank you so much for sharing!!
Pingback: Charlie Brown Cookies
Love this tutorial!I tried this way to make some vintage beetle car cookies and I think that they turned out very cute (It was my first use of kopykake for an image and not letters).Thank you!
Encuentro fantástico todo lo que nos enseñas y explicas a la perfección. Te lo agradezco.
Saludos desde Chile
Pingback: Superman Cookies
My only problem with my KK is seeing my hand shadow as I try to pipe. It makes me crazy!! That and concentrating too hard on not moving the cookie. If I could just get passed these to obstacles I’d love my KK, too! : )
Woot! Your wonderful post convinced me to get a KopyKake. Hubby and I own a bakery and while I’ve known I’ve needed one for some time, seeing the magic in action pushed me over the edge. This is gonna save me a TON of time on cookies, cupcakes and cakes. THANK YOU! 🙂
My only regret is that I didn’t buy mine sooner. I could do the cookies without one, but I can do the cookies with one in less than half the time! I cannot believe I held out so long! My KK has saved me tons of stress and tears!
Pingback: Simplifying Multi-Colored Cookie Designs
Pingback: Texas Rangers Cookies
Pingback: Simple Jake and the Neverland Pirates Cookies
There are different models of KK. Which do you recommend? I’m so anxious to buy one after reading your wonderful site!
Ordering my KopyKake in the next few weeks!! I’ve been reading EV-ER-Y-THING I can on using it for cookies. Thanks for the tips!!
Hi- I’m wondering what color you used for iron mans face? I’m making these for a little boys bday but can’t figure out the face color. Any help would be appreciated. Thanks!
I am so impressed with your work and that you share it! I have never decorated cookies like this and will be trying the UT Longhorn, not the hand. I will flood it like the hand on your tutorial. I hope all goes well and if it looks half as good as yours I will be happy. My daughter will be going to Texas Tech this fall, so I will try your TT cookies for her going away party. Unfortunately, I already made cookie dough from another website before I found your blog, but for the TT cookies I will try yours.
OOOH! A Red Raider! Lubbock is in my back yard! Wish her luck!
Hi there!!!Aside from absolutely LOVING your work, I was checking the blog out specifically for some KopyKake info! I was thinking of getting one but was a little freaked out when I saw “projects on walls,” etc. That did not seem too useful for me. So I figured I should ask you…is there any particular model that is best suited for cookies? I noticed you use it quite a bit. I do more than cookies, but it appears to be a pretty useful tool! What are your recommendations? Thank you!!!
Hi are you accepting orders? If so how can I get in touch with you regarding these and some avengers cookies I saw on your Instagram page? Thanks.
Awesome job!! Love your site!! What colors did you use to get the icing colors so perfect??
Pingback: Avengers Cake Design Inspiration on Craftsy!
Pingback: 13 Iron Man Party Ideas | Spaceships and Laser Beams
I know this post is super old, but do you know what colors you used? I have a hard time deciding, and yours are pretty spot on to what i see in my head. Thanks